Access
To open the Attribute Editor search page, select Master Data from the main menu and Attributes (in the Classification section).
Contents
Overview
Attributes are not predefined. Customers can use attributes the way they need them for their requirements. To simplify the customization, some attributes are shipped together with the application. Attributes are data items which describe properties of products. An attribute can be used in multiple classifications. You can assign attributes to classification groups. Afterwards the attribute values can be edited within the product editor.
For example: a car can be described by its attributes make, model, color, and more.
See the Basic Actions page for more info on standard actions (search, sort, edit, delete etc.).

Create Attributes
To create a new attribute, click the Create button to open the Attribute Editor. It consists of the tabs: General, Values, Presentation and Responsibilities.
General Tab
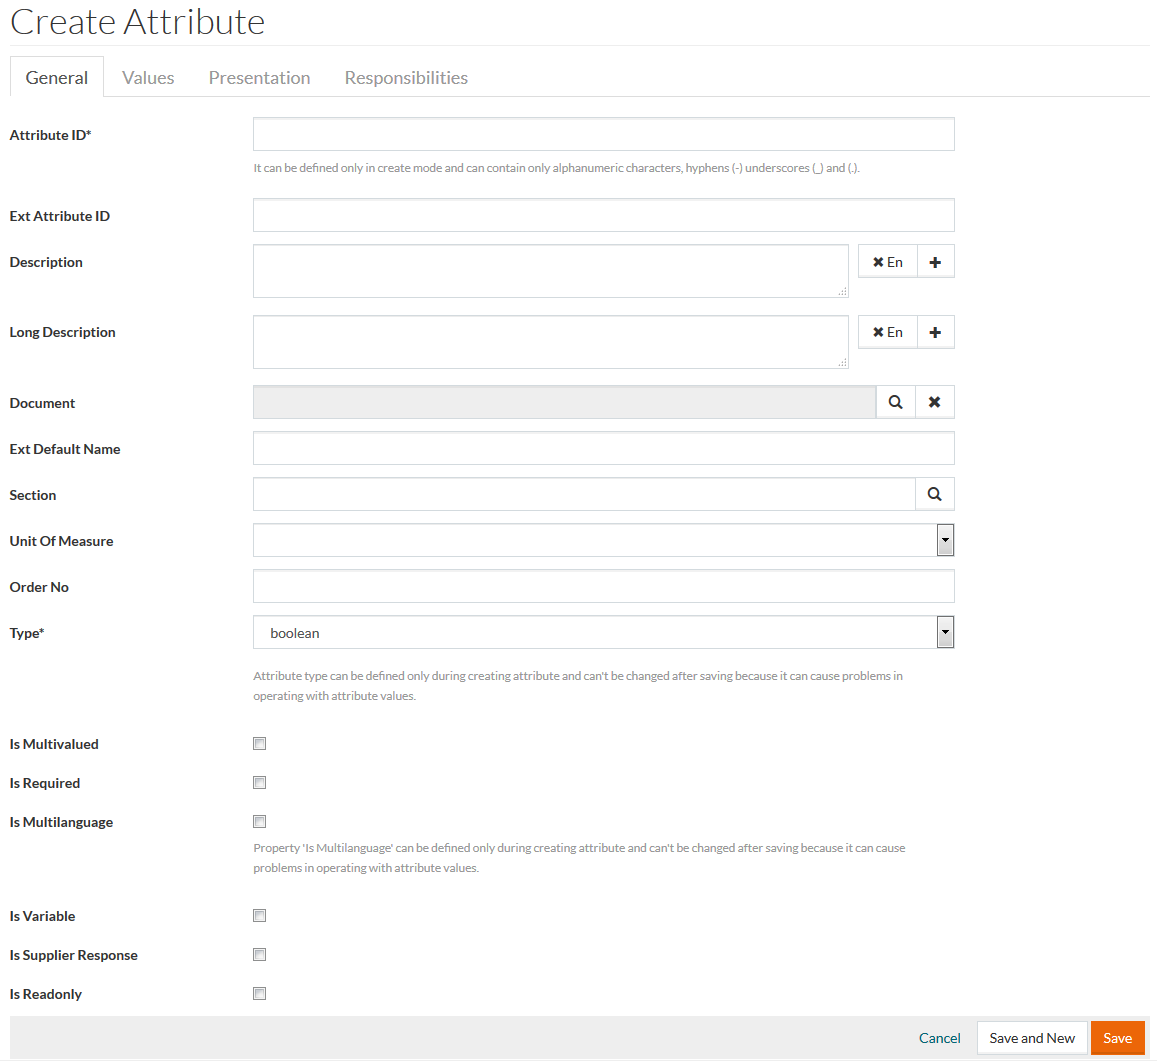
Attribute ID can only contain alphanumeric characters (letters A-Z, numbers 0-9), hyphens ( - ), underscores ( _ ) and dot (.).
On the General tab, enter the Attribute ID (which can be defined only in create mode) and select the attribute Type from the drop-down list. Both these fields are mandatory. Depending on the Type selected, different input fields are rendered. Regular Expression field rendered for string, text, document and email types does not apply to items, loaded via the subsystem, Min/Max Value fields rendered for integer and numeric types and Min/Max Length fields rendered for string and text types define minimum/maximum input numbers/characters limits.
Existing attribute values like - Min/maxLength, min/maxValue, RegEx and number Formats cannot be changed.
However, if Attribute Values exist:
- Any decrease of "maxLength" is not allowed.
- Any increase of "minLength" is not allowed.
- Any decrease of "maxValue" is not allowed.
- Any increase of "minValue" is not allowed.
- Any changes to RegEx are not allowed.
- Any changes to Number Format are not allowed.
If required, fill in data for the following fields:
External Attribute ID - can be used for attributes which have different Units of Measures (UoMs) in different languages where each attribute needs a separate ID.
Description and
Long Description - select the desired language from the drop-down list of options. Click
 to add descriptions in several languages and
 to delete the entry.
Attribute Description appears as a label in the Attribute column. Long Description is displayed in a separate column.
The Order No. is a global key for attributes in the system, which controls the place where this attribute is displayed in the Product Editor later.
Select Section using the search icon.
Select Unit of Measure from the drop-down list.
Specify External Default Name - parameter name by which the attribute may be identified; sometimes default values are not static but depend on context, e.g. default values can be passed to the application using OCI in url. So url may contain USERDATA_NAME=Frank; in this case if extDefaultName of attribute is USERDATA_NAME, then default value for this attribute will be frank.
Click to select the required checkboxes for:
- Is Multivalued - means this attribute can have multiple values which can be entered in the product editor.
- Is Required - marks the attribute as obligatory. If this attribute is not filled in the product editor, the product cannot be saved.
- Is Multilanguage - means attribute values can be defined in multiple languages like English, German etc. (this attribute can be defined only in create mode, is not editable).
- Is Variable - marks an attribute which is to be filled on the detail page in the OPC application - e.g. if a wooden stamp or business cards are ordered, the required text lines must be specified. In case a product contains at least one attribute with flag isVariable='Y', it is called a SmartForm.
- Is Supplier Response - the flag is used for attributes that should not be filled in by Customer during RFQ creation/editing process in OPC/PROC/SDP.
- Is Readonly - means the attribute is read-only purely for information purposes and cannot be edited.
Values Tab
Set the Default Value, used as attribute value in case other attribute values have not been defined.
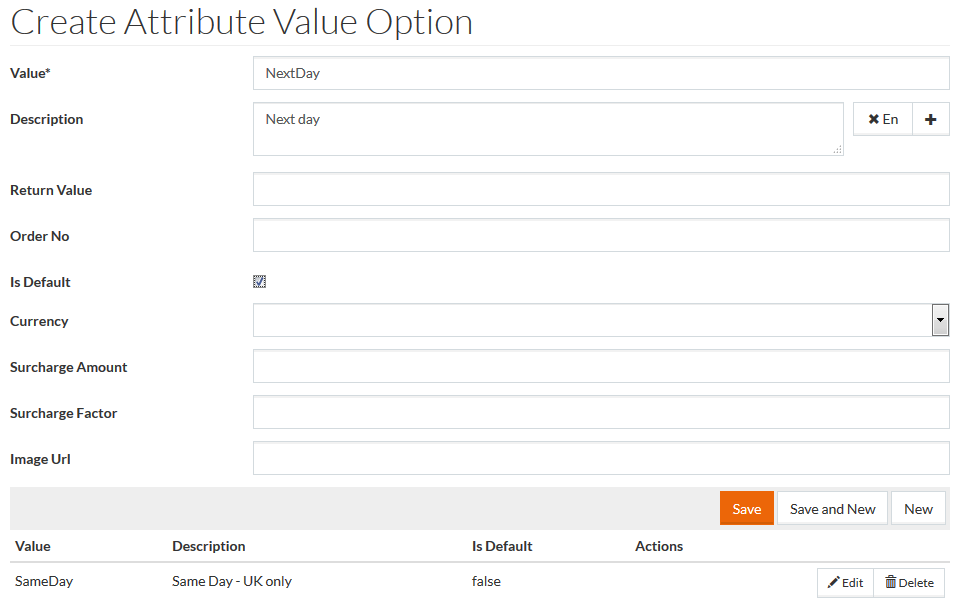
Edit the configurable Value Options using the Edit button, when needed. The Attribute Value Option Editor opens.
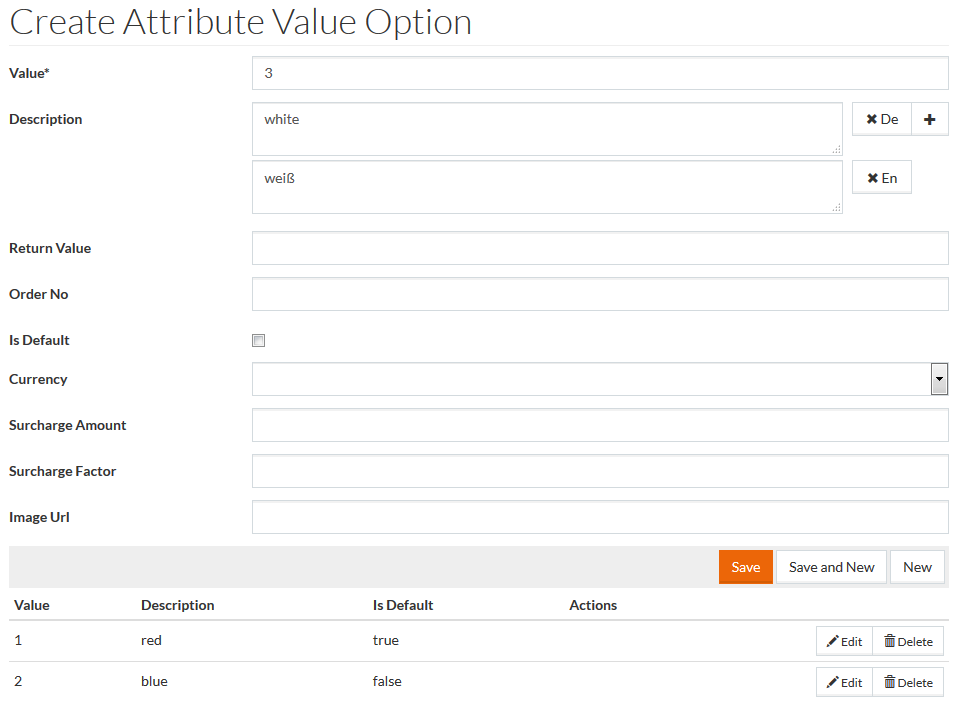
If any Surcharge Amount is used for the Value List Option, it is required to select the Currency for the value.
And vice versa, if any Currency is selected for the Value List Option, it is required to enter the Surcharge Amount.
Expression - these expressions can be used to relate attribute values from other attributes, e.g. for a calculation of attribute values. It can contain properties of a product and references to other attribute values of products, e.g.:
'${attributes[Width] * attributes[Height]}' or '${attributes[Color]} car ${productId}' This field does not apply to items loaded via the subsystem.
Select the attribute value language from the drop-down in case the attribute is multi-language and click the
Expression button to see the list of the available expression types.
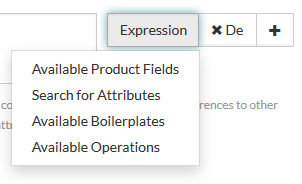
Click the appropriate option to select.
Available Product Fields Expression
Choose Available Product Fields Expression.

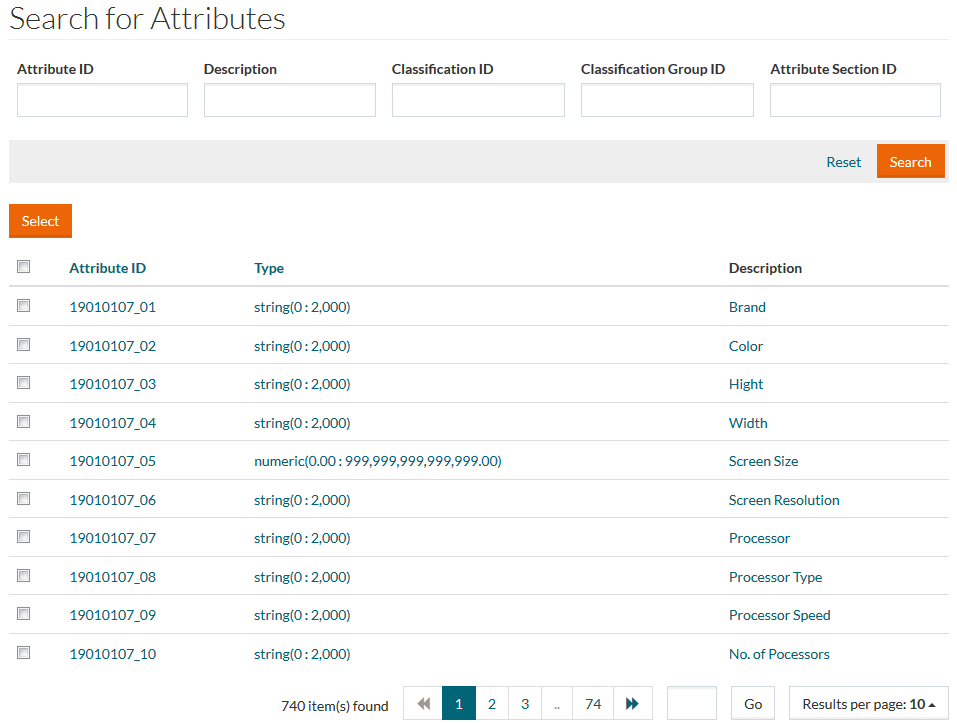
Search for Attributes Expression
Choose Search for Attributes Expression.
Available Boilerplates Expression
Choose Available Boilerplates Expression.

Available Operations Expression
Choose Available Operations Expression.
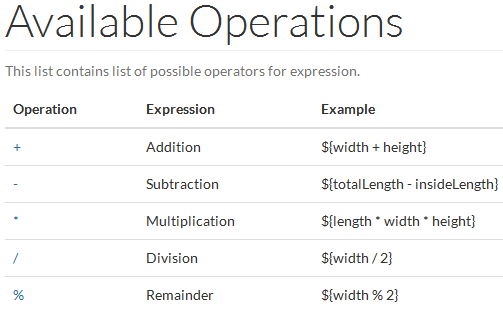
It is also possible to create conditions like: "if field xy = 100, then...".
In principle all functions defined in the Object-Graph Navigation Language (OGNL), see
http://commons.apache.org/proper/commons-ognl/ can be used.
Example : ${attributes.offer_nr == '' ? 'No entry' : attributes.offer_nr }
${attributes.offer_nr.startsWith('100') ? attributes.offer_nr : 'No entry'}
|
|---|
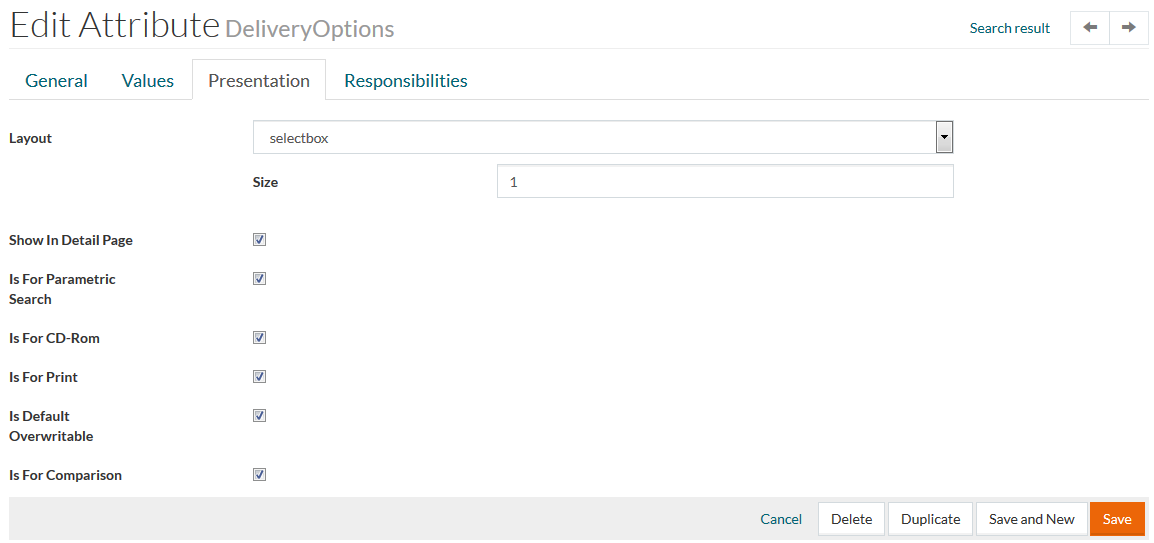
Presentation Tab
From the Presentation tab, select the Layout from the drop-down list to define the attribute presentation layout. Note, that available options depend on the Attribute Type selected on the General tab. Depending on the selected Layout, the following fields are rendered:
| Layout | Field | Description |
|---|---|---|
| text, referenceSearch | Max Length Size | Defines the maximum length of the input characters limit. Defines the number of rows. |
| textarea | Rows Cols | Defines the height of the input area. Defines the width of the input area. |
| selectBox | Size | Defines the number of rows. |
Click to select the required checkboxes for:
- Show In Detail Page - defines whether this attribute should be displayed on OPC Product Details page.
- Is For Parametric Search - defines whether this attribute will be displayed among attribute facets on the Search Result page and attributes on Advanced Search panel.
- Is For CD-Rom - defines whether CD-Rom with product data should contain info about this attribute and its values.
- Is For Print - defines whether this attribute should be displayed on Product Preview PDF which can be printed (in CMP application).
- Is Default Overwritable - defines whether it is possible to overwrite attribute value by external values (e.g. during OCI login).
- Is For Comparison - defines whether attributes should be used on Products Compare page.
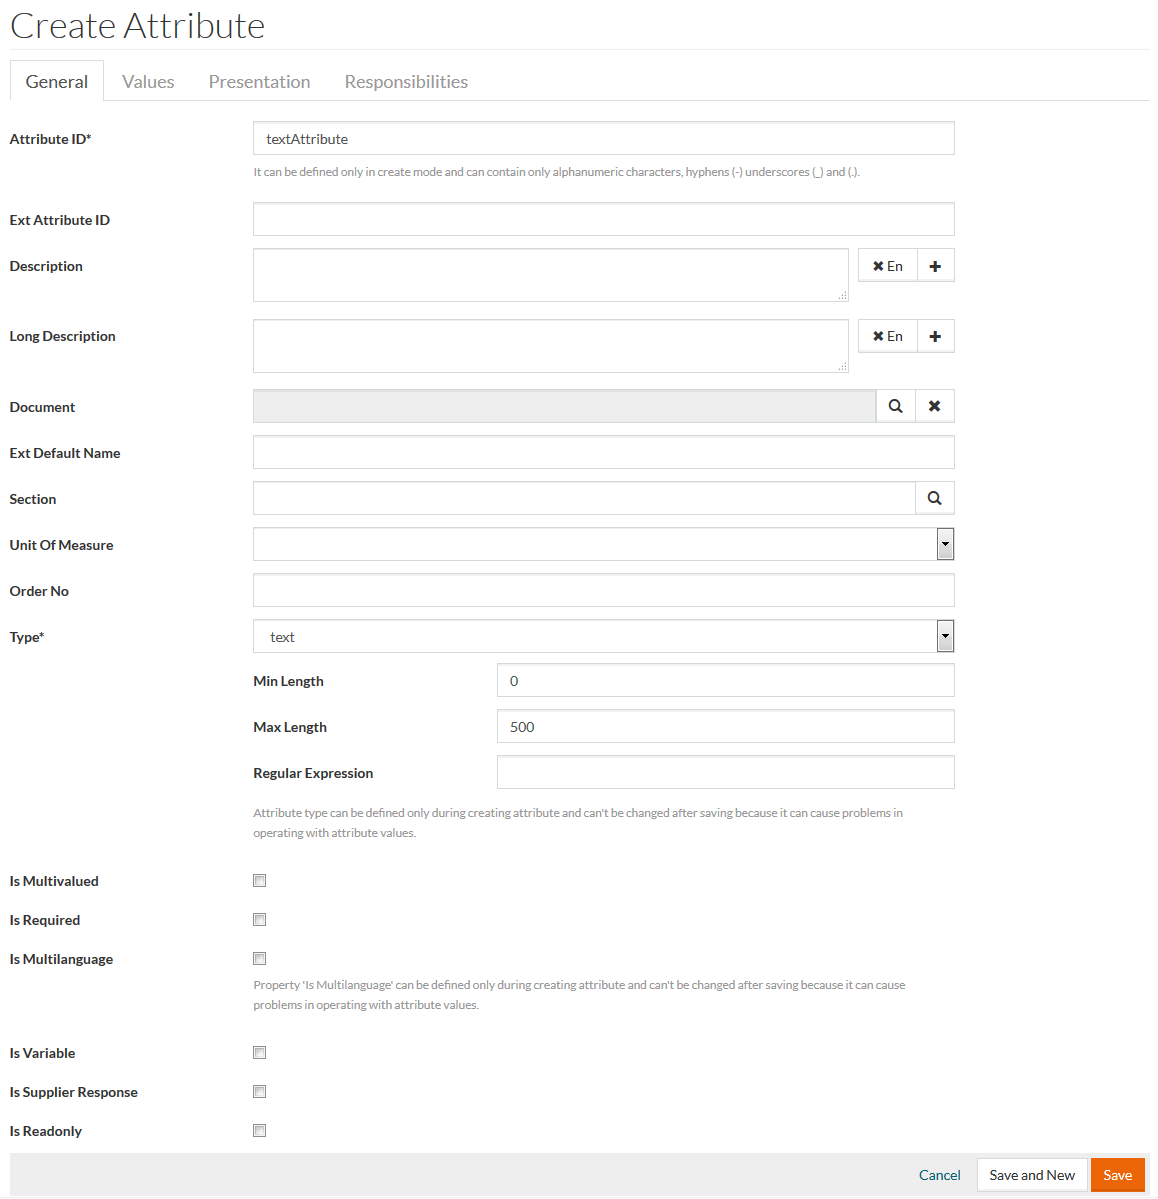
Example 1
Enter the attribute name and select Type from the drop-down list. The type of data will define the presentation of the page. Type can be of boolean, string, text etc. For example - select text from the drop-down list. After selecting the Type, click Save to save the newly added attribute.
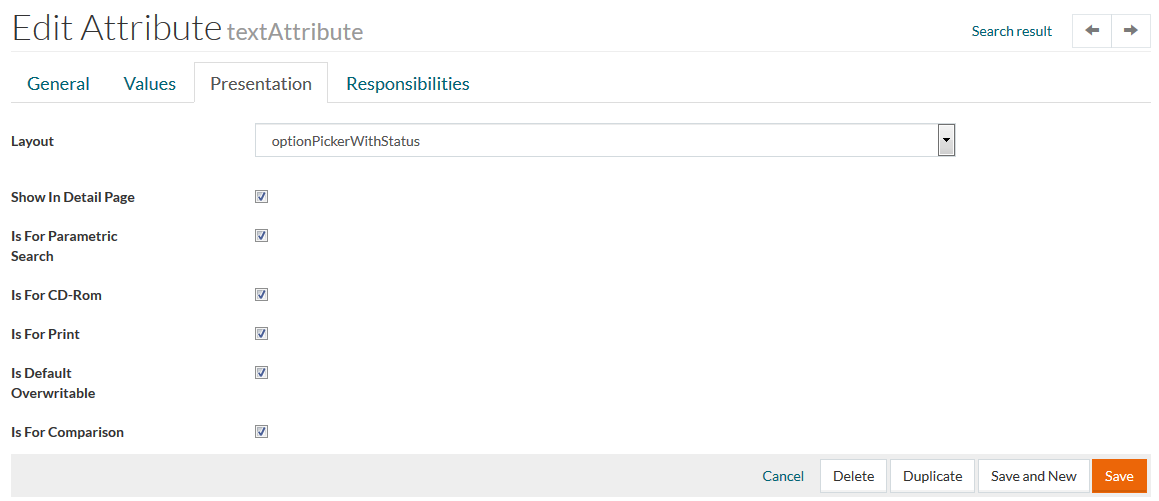
After two mandatory and optional additional fields filling completing, click Save to save and continue. On the Presentation tab, select the Layout from the drop-down list. For example, select optionpickerWithStatus:
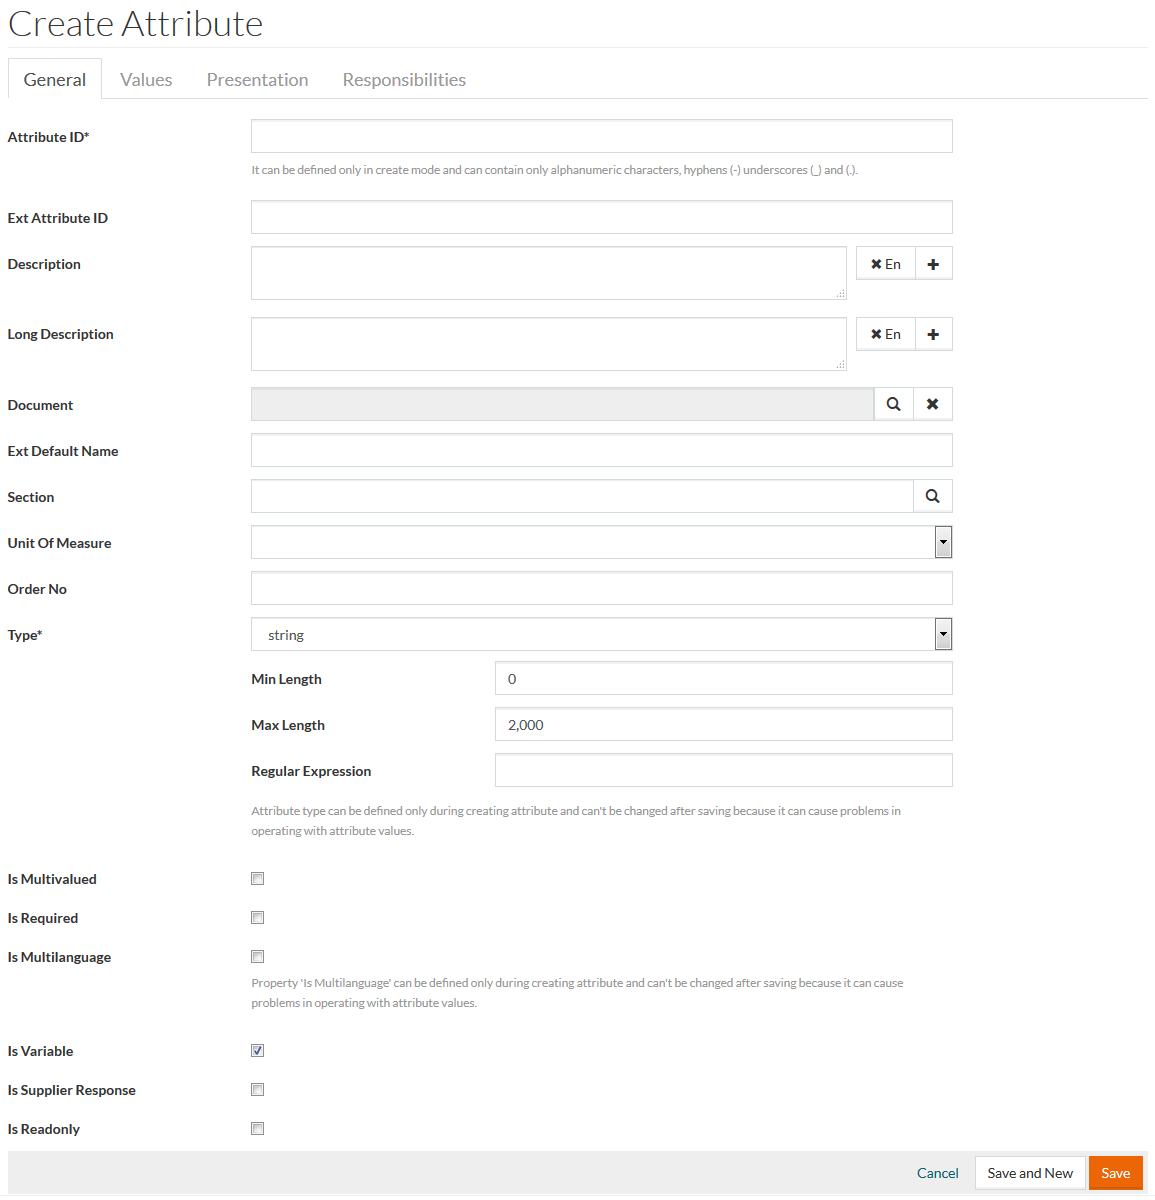
Example 2
In another instance, in case surcharges need to be displayed in OPC it must be defined first. To create an attribute with surcharges you need to set the following options:
- Is Variable = true;
- Attribute Value Options with surcharges;
- Layout = selectbox.
First, select Type and enable the checkbox Is Variable on the General tab.
Then open the Values tab to define Value Options.
After saving proceed to the Presentation tab, for Layout choose Selectbox from the drop-down menu and save the changes.
This in turn will be reflected in OPC as relevant options to select on the Shopping Cart page.
Once all data is entered, click Save to save the newly added attribute or click Cancel to cancel the action. It is also possible to create a new attribute while in edit mode in Attribute Editor by clicking Save and New. Click the Duplicate button to duplicate or create a copy of an attribute (this button is available only in edit mode).
Responsibilities Tab
On the Responsibilities tab, you can add new Responsibilities to the Attribute. To create a new Responsibility, click the Create button. Click the Edit / Duplicate / Delete button for the appropriate action on existing Responsibility. Click the Refresh button to refresh the page.
Duplicate Attribute
Click the Duplicate option from the Edit drop-down menu on the search page to create a copy of the existing attribute. Enter a unique Attribute ID and click Save to save a duplicated attribute. Click the respective Duplicate button on the Attribute Editor page to duplicate the respective properties of the existing attribute.