Access
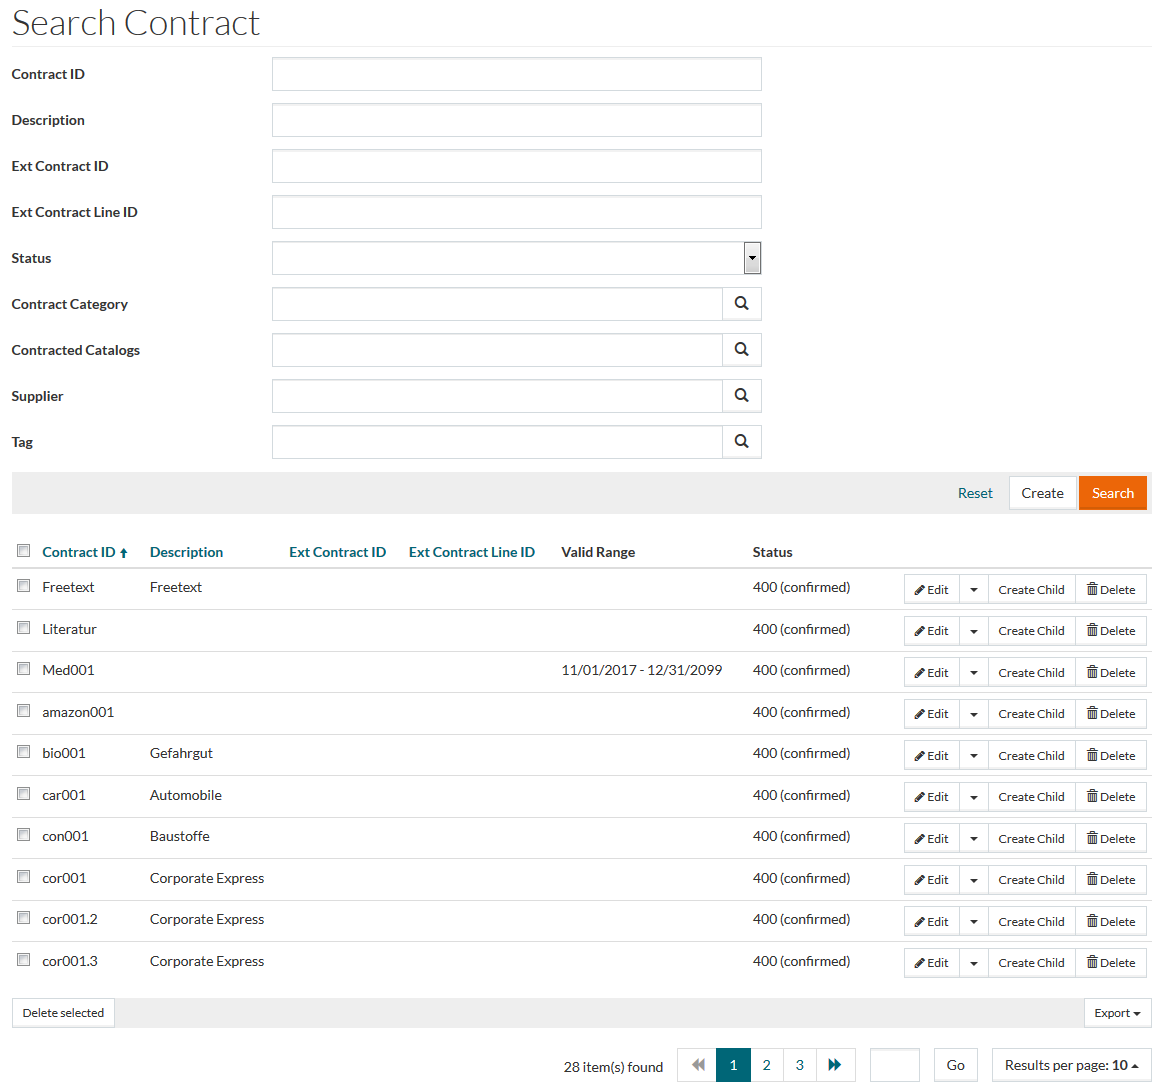
To open the Search Contract page, select Master Data from the main menu and then Contracts (in the Contracts section).
Contents
Functionality
A Contract contains agreed prices and frames them. It also controls the visibility of products, catalogs and classification groups, which further influence the creation of Assortment.
All Contract-related information can be managed through Contracts.
See the Basic Actions page for more info on standard actions (search, sort, edit, delete etc.).
Create Contracts
To add/create a new Contract, click the Create button to open Contract Editor under the General tab of the editor where it is possible to add/create and edit general Contract information.
General Tab
General Tab contains basic contract information. Enter general data for Contract ID (max. length is 100 symbols, should be unique) and select Status from the drop-down list. Both these fields are mandatory.

If required, enter data for other parameters as well, such as Description, Ext Contract ID, Ext Contract Line ID, Number of Prices, Valid Range field, the search icon to search and select Parent Contract and Contract Category from the respective browsers and Currency from the drop-down list.
As soon as the contract expires (based on the defined Valid Range interval) the corresponding notification email will be sent to to the responsible user.
Contract responsibilities can be managed in the PROV Responsibility Editor (Responsibility Type = Contract, level = 20), user email can be set the in the PROV User Profile or User Editor.
Click Save to save a newly created contract. This also enables the Attribute Values, Catalogs, Customer, Boilerplates, Supplier, Groups and Additional tabs of the Contract Editor. All associated/related Contract information is provided here. To cancel, click Cancel.
Attribute Values Tab
Click the Attribute Values tab of the editor to open the Attribute Values page where it is possible to see/edit the existing Attribute Values.
Select the desired language from the drop-down menu (for multi-language attributes) and enter the value into the appropriate field. Click Save to apply changes.
To get a list of the Attribute Value's revisions click the Revisions link, which appears after saving the attribute value.
Catalogs Tab
Click the Catalogs tab of the editor to open, add/edit Contracted catalog data to create a connection between catalogs and the Contract.
The Contract applies to all products in the catalog and it is possible to add catalogs to the Contract or remove them on this page. Click the Create button to add Contracted catalog entries. Use the Open Catalog Editor button to open Catalog Editor and manage Catalogs.
To delete an entry click Delete. To edit Contracted Catalog, click Edit. To refresh the page click the Refresh button.
Customer Tab
Click on the Customer tab to add Customer Usage. Use this function to assign/add Customers to Contracts.
Click
 to add customer usage entries. Click
 to remove the selected assignment.
Click Save to save after making the necessary changes, or Cancel to cancel.
Boilerplates Tab
Boilerplates tab can be used to assign a standard Document Template to a Contract.
Click
to add a new boilerplate entry. Click
to remove the selected assignment.
Boilerplates are created and managed in PIM. They can also be imported as a a part of System Master Data. See the Manage Jobs page for details.
Click Save to save after making the necessary changes, or Cancel to cancel.
Supplier Tab
Click the Supplier tab to add Supplier usage. Use this function to assign/add Suppliers to Contracts. Click the Create button to add new Supplier assignment.
Click Edit to edit the selected assignment, or Delete to remove it. To refresh the page click the Refresh button.
Groups Tab
Click the Groups tab to add Contracted Classification Group data. Click the Create button to add new Group assignment.
Click Edit to edit the selected assignment, or Delete to remove it. To refresh the page click the Refresh button.
Additional Tab
Click the Additional tab to add/edit other Contract-related information, in particular the information concerning:
- Order
- Special Treatment
- Terms
- Types
Click the
 icon to show the selected section or the
 icon to hide it.
Order
Specify order information for the Contract in this section such as Contracted amounts, surcharges, minimum value requirement etc. Define Min Order Value if any, select whether a Min Order Value is required or not etc.
Special Treatment
Select the check boxes to define whether any Special Treatment is required - e.g. if the Contract contains chemical, hazardous or safety items/products.
Possible values for the input fields in Special Treatment section:
- yes
- no
- don't know
Terms
Enter details or select using the search icon to specify Terms of Payment and Terms of Delivery for a specific Contract.
Type
The scope and complexity of a Contract will vary depending on the Type of Contract involved. This section allows to define the type of Contract - whether it is a Contract for a "Buyer" or a "Seller".
Select the check boxes to set the Contract as Standard, Preferred, Frame Contract, Internal or Offer.
Click Save to save the information. To cancel, click Cancel.
Attachments Tab
In case you want to add an attachment to a contract, use the Attachments tab.
Click the Manage Attachments button to manage the attached files.
OCI Object Visibility Tab
It is possible to assign a Contract to OCI Object Visibility.
Enter the OCI Object Visibility description, parameters or values into the
OCI Object Visibility field to select the OCI Object Visibility from the available autocomplete list or click
![]() to open OCI Object Visibility reference search and select.
to open OCI Object Visibility reference search and select.
OCI Object Visibility entries avilable for selection can be created and edited on OCI Object Visibility page.
It is possible to assign multiple OCI Object Visibility entries.
To delete an entry from the assignment, click on its label and use the Delete key from your keyborad or click the cross icon in the label.
Click Save to save the information. To cancel, click Cancel.
All saved assignments can also be viewed and edited from the Contract to OCI Object Visibility page.
Create Child
Contracts can be organized hierarchically. Contract Hierarchy is used for Price determination and is helpful, for example, in case of temporary special offers (discounts for sales etc.). If there are several Contracts in a hierarchy, then Price will be taken from the child contract of the lowest level.
In case you wan to create a sub-contract of a current Contract click the Create Child on the Search result page or on the Contract editor page.
A Contract creation page with predefined Parent Contract will open.
Revisions
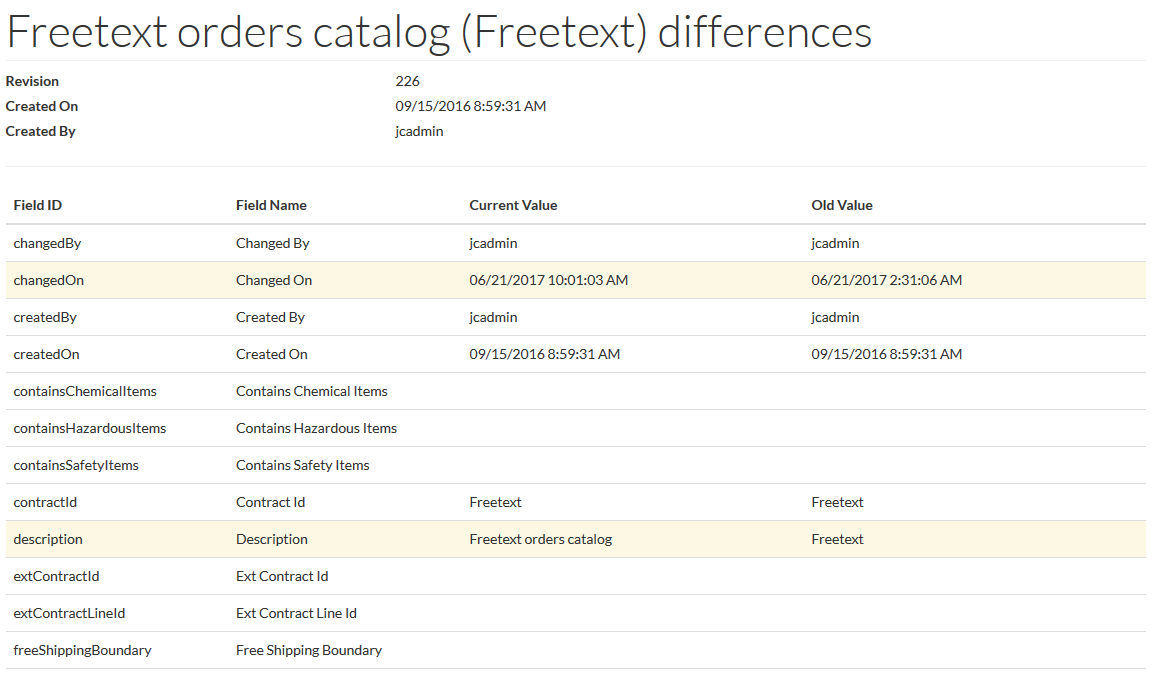
Click the Revisions option from the Edit drop-down menu or the Revisions button to get the list of the Contract revisions.
Click the Changes link to see the Revision details: