Access
Select System Administration from the user menu and then Manage Jobs (under the System Administration section) to open Manage Jobs page.
Contents
Overview
To search for existing jobs, enter Job Name and/or select Status, Last execution status and Job Group from the drop-down menus and use Search to initiate search and display search results.
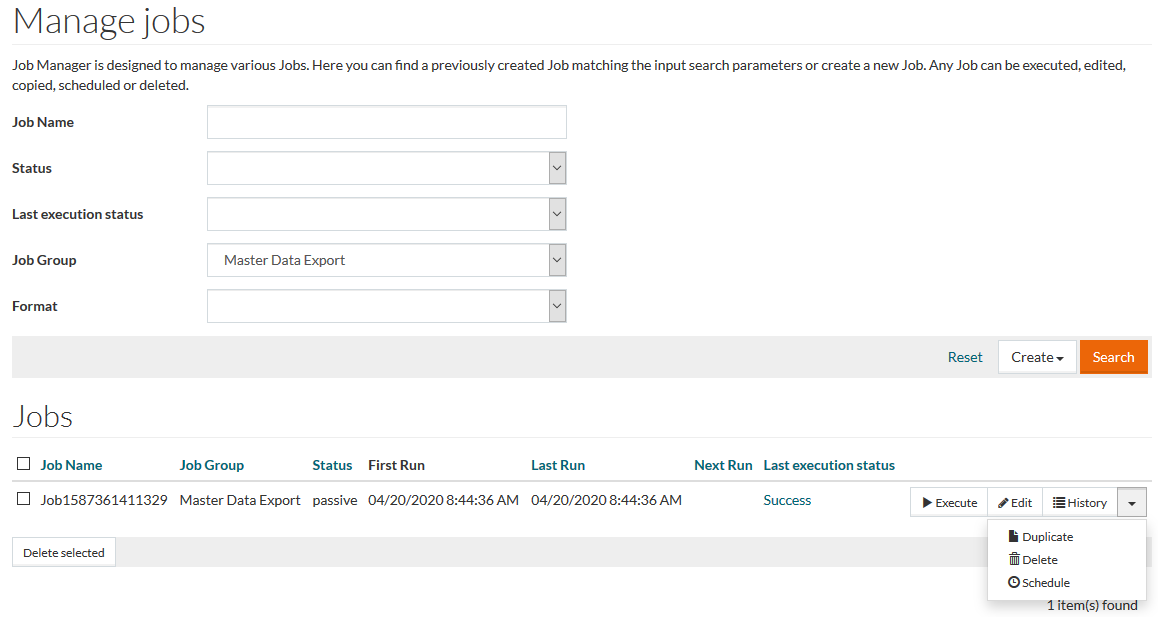
Click the following buttons of the search results table:
- Execute - to execute the selected job;
- Edit - to see/edit the selected job parameters.
If editing is available, you can make the required changes and click Save to save the entered parameters. Click Cancel to cancel, or Back to return to the previous page.
- History - to display Execution/Finish Time, Execution status, Log and Result files.
Click the Delete older button on the Job History page to delete the Execution History older than the Execution after date.
Click the History drop-down menu on the search results table to unfold additional actions:
- Duplicate - to make a copy of the selected job;
- Delete - to delete a job entry from the search results table;
- Schedule - to set new scheduler parameters.
To delete several entries simultaneously from the results table, select the check boxes next to the items to be deleted and then click the Delete selected button to delete them.
Select the check box displayed in the header section of the results table to select all entries listed and then click the Delete selected button.
Job Groups
Currently the following jobs can be executed in PROV via Manage Jobs functionality:
Master Data Export
To create the Master Data Export Job, select it from the Job Group drop-down list on the Manage Jobs page and click
 .
.
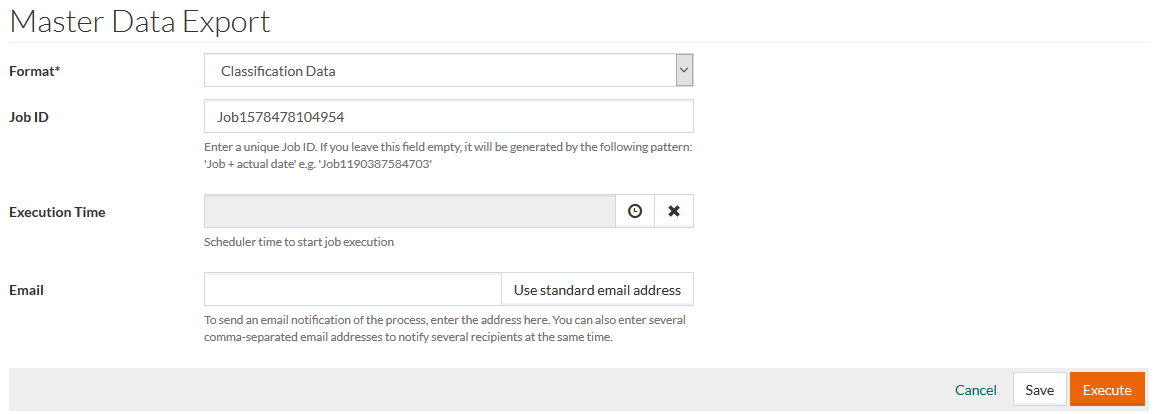
Select the Format for the master data. The following formats are available:
- Product Fee Data
- Catalog Contract Data
- System Data
- User Data
- Classification Data
- Accounting Data
- Business Partner Data
- Buying Organizations View Data
- Posting Data
- Responsibility Data
- OCI Object Visibility Data
- Organization Data
The Job ID is pre-filled, but you can type any other unique Job ID.
Set the Execution Time for the job using a scheduler
![]() , when applicable.
, when applicable.
To receive an email notification on the job execution status, enter the email address into the Email field or click Use standard email address.
The Use standard email address button fills the Email field with the email address specified in the User Profile or User Editor.
Click
 to save the Job or
 to execute it immediately. Click the
Cancel link to cancel any changes and return to the
Manage Jobs page.
to execute it immediately. Click the
Cancel link to cancel any changes and return to the
Manage Jobs page.
Master Data Import
To create the Master Data Import Job, select it from the Job Group drop-down list on the Manage Jobs page and click
.
To import Master Data (Excel and CML 2 import), the user should have Customer/Supplier assignment.
A user with 'SysAdmin' role may execute the import without any Customer/Supplier assignment.
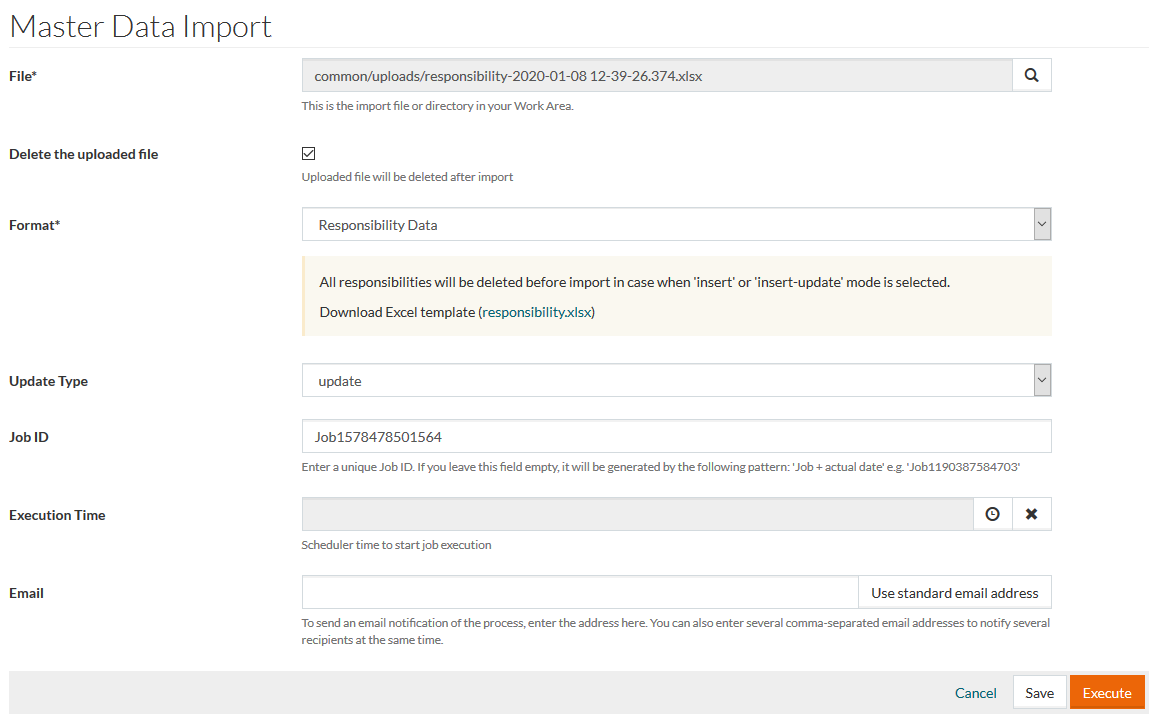
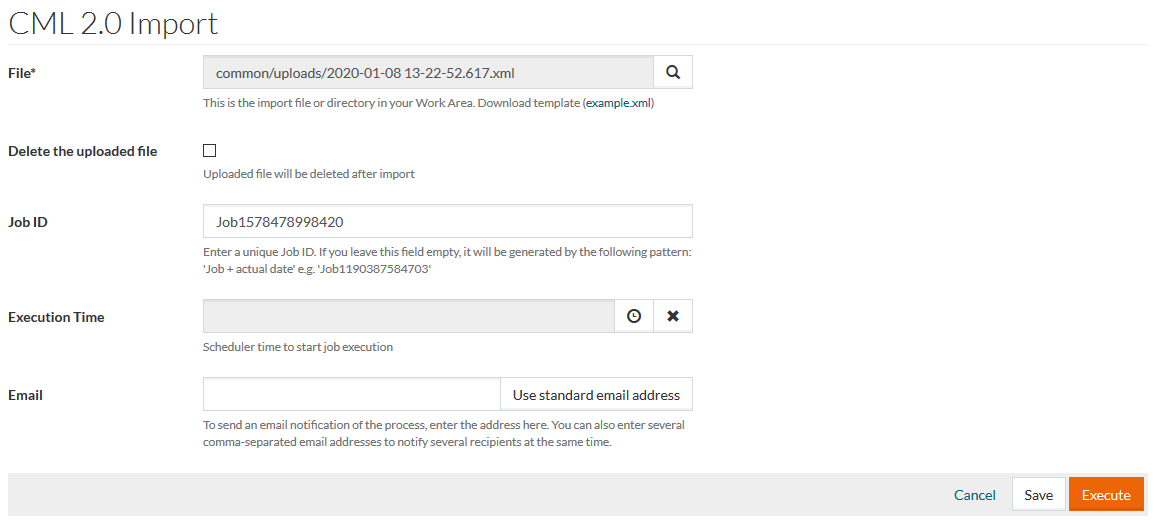
A file with the master data for import should be uploaded to your Work Area. Click
![]() to select the file from the Work Area.
to select the file from the Work Area.
Select Delete the uploaded file, if you want the uploaded file to be deleted from the Work Area after the import.
Select the Format of master data to import.
All files with the master data for import should comply with the format provided in the relevant Excel template. Select the format and click the link under the Format field to download the appropriate template.
The following Formats are available:
- Product Fee Data
- Catalog Contract Data
- System Data
- User Data
- Classification Data
- Accounting Data
- Business Partner Data
- Buying Organizations View Data
- Posting Data
- Responsibility Data
- OCI Object Visibility Data
- Organization Data
By default, Master Data Import is performed in ' collection-merge' mode as described in CML 2.0 Import section below.
However, there may be exceptions and some data may be replaced or erased (if not specified) during import. See details in the relevant message, which appears after selecting the Format.
See the detailed information about the sheets/tabs in master data template file for every format in the table below:
| Product Fee Data | Catalog Contract Data | System Data | User Data | Classification | Accounting Data | Business Partner Data | Buying Organizations Views Data | Posting Data | Responsibility Data | OCI Object Visibility Data | Organization Data |
|---|---|---|---|---|---|---|---|---|---|---|---|
|
|
|
|
|
|
|
|
|
|
|
|
Hover the cursor over the column name on any sheet of the template to see the requirements to the field values. E.g. whether the field is required, value type (boolean, string, etc.), max/min value, if any.
Boolean type values in the import file should be typed as 'TRUE' or 'FALSE'.
Select the Update Type. The following types are available:
- insert: to add new data
- update: to update existing data
- insert-update: to add new data and update the existing.
The Job ID is pre-filled, but you can type any other unique Job ID.
Set the Execution Time for the job using a scheduler
![]() , when applicable.
, when applicable.
To receive an email notification on the job execution status, enter the email address into the Email field or click Use standard email address.
Click
 to save the Job or
to execute it immediately. Click the
Cancel link to cancel any changes and return to the
Manage Jobs page.
to save the Job or
to execute it immediately. Click the
Cancel link to cancel any changes and return to the
Manage Jobs page.
Import Job via Hot Folder
Master data import can be performed automatically via hotfolder approach.
To import master data, upload a zip archive with master data import file (Excel) and job parameters file (.json) into /hotfolder/masterDataImport/ folder in Work Area.
The import job with the relevant job parameters will be executed. It:
- checks if there are any files in the Hot Folder
The time intervals for the import job to start (to check if there are any files uploaded in the Hot Folder) can be set in configuration attribute.
- unzips the files into /common/uploads/tmp folder in Work Area
- performs the import
- deletes the uploaded import files
The information on executed job can be found on the Manage Jobs page.
CML 2.0 Export
To create the CML Export job, select
CML 2.0 Export Job from the
Job Group drop-down list on the Manage Jobs page and click
.
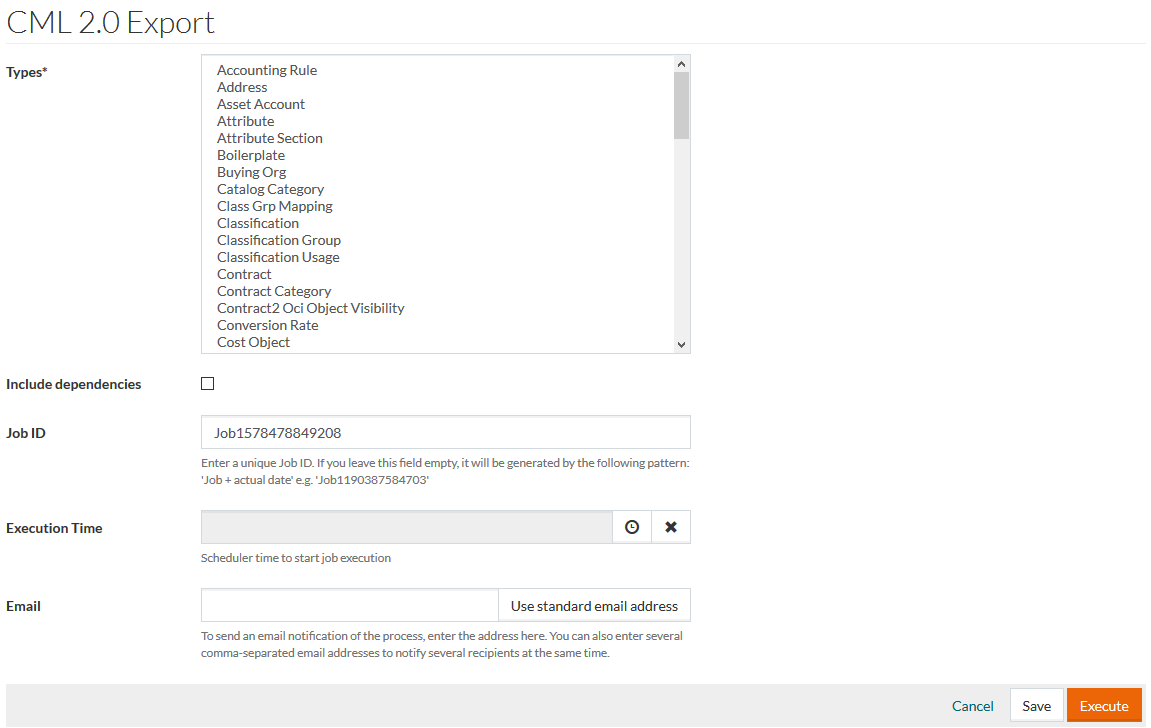
Select Types of the data to export. Multiple selection is possible to export different types in one CML-file.
Select Include dependencies, to export other related data along with the selected Types. For example, when the flag is set, the export of Supplier Provisioning type will also include the related Customer, Supplier, etc. data.
To receive an email notification on the job execution status, enter the email address into the Email field or click Use standard email address.
Set other Job parameters, when necessary and click
to save the Job or
to execute it immediately.
After the job execution, the resulting export file can be found in the following Work Area folder: common/work/exports/cml/masterdata/.
CML 2.0 Import
To create the CML Import job, select
CML 2.0 Import Job from the
Job Group drop-down list on the
Manage Jobs page and click
.
A
File with import data should be uploaded to your Work Area. Click
![]() to select the file from the Work Area.
to select the file from the Work Area.
Select Delete the uploaded file, if you want the uploaded file to be deleted from the Work Area after the import.
To receive an email notification on the job execution status, enter the email address into the Email field or click Use standard email address.
Set other Job parameters, when necessary and click
to save the Job or
to execute it immediately.
CML import can be performed in two modes:
- collection-merge: to update the existing data which is different from the import file, insert new data; leave other existent data unchanged.
- collection-replace: to replace the existing collection with the imported collection. This mode deletes all previous data and inserts new data.
If no mode is specified in the CML, by default the whole collection is updated in ' collection-replace' mode.
Example for Import Modes
Below is an example of User Roles data for User2 in collection-merge mode provided that the user already has Role1 and Role2 (with `IsGrantable` 'true' value):
<Command mode="insert-update">
< CatalogUser >
<LoginName> User2 </LoginName>
< Customers mode=" collection-merge "/>
< UserToRoles mode=" collection-merge ">
<User2Role>
<RoleName> Role2 </RoleName>
< IsGrantable > false </IsGrantable>
</User2Role>
<User2Role>
<RoleName> Role3 </RoleName>
< IsExecutable > true </IsExecutable>
< IsGrantable > false </IsGrantable>
</User2Role>
</UserToRoles>
</CatalogUser>
</Command>
As the result of the import:
- Role1 remains unchanged
- Role2 is updated with `false` value for `IsGrantable` property
- Role3 is added
In case of the same import in collection-replace mode:
- pre-existent Role1 is deleted
- Role2 is updated with `false` value for `IsGrantable` property
- Role3 is added
Single Classification Excel Data Export
To create a job to export the master data related to the selected classification, select Single Classification Excel Data Export from the Job Group drop-down list on the Manage Jobs page and click Create.
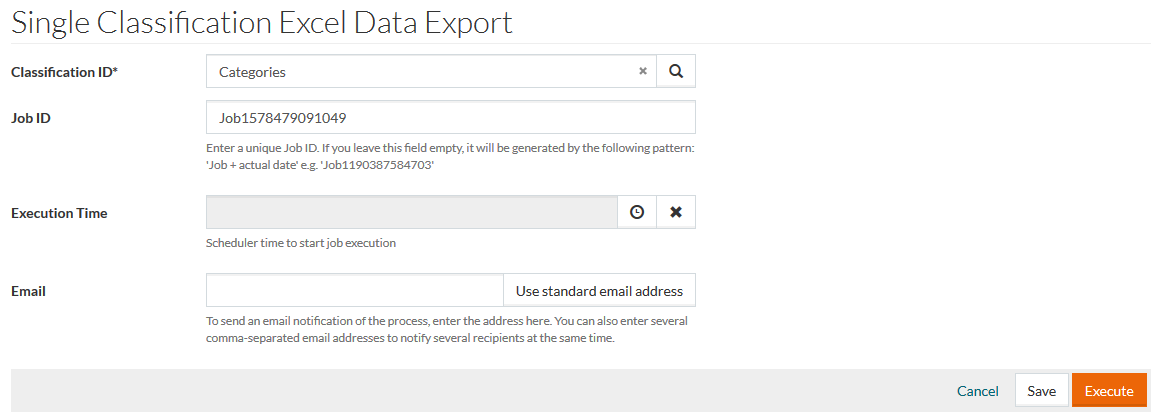
Select the Classification ID by using the auto-complete function or classification reference search available by clicking
![]() .
.
To receive an email notification on the job execution status, enter the email address into the Email field or click Use standard email address.
Set other Job parameters, when necessary and click
to save the Job or
to execute it immediately.
Single Classification Excel Data Import
To create a job to import the master data related to a single classification, select
Single Classification Excel Data Import from the
Job Group drop-down list on the
Manage Jobs page and click
.
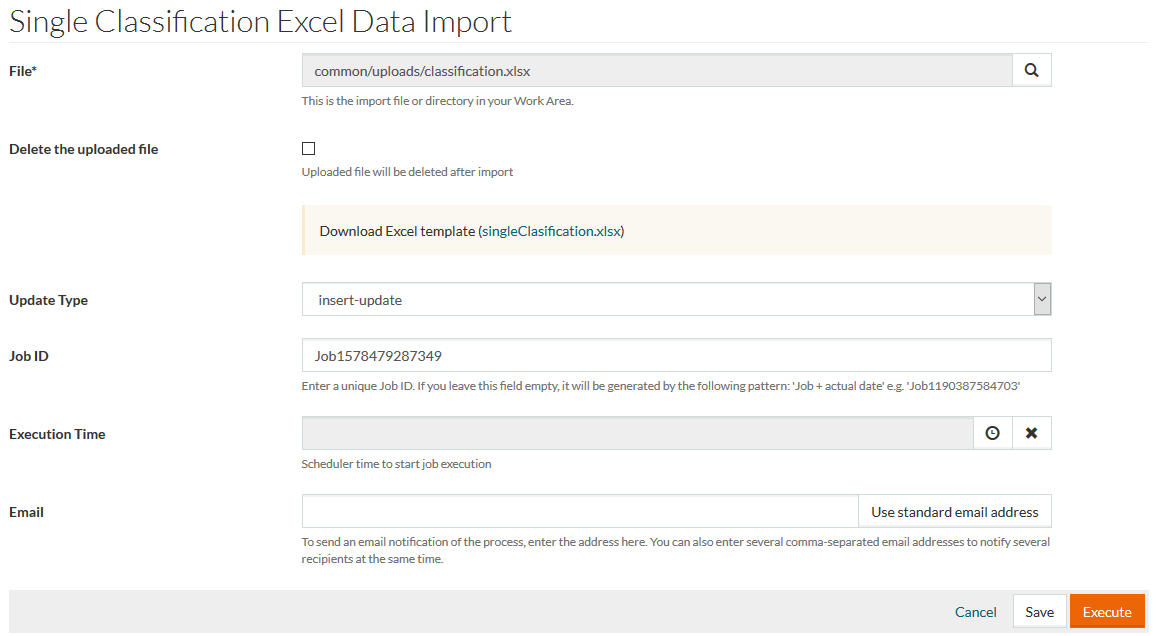
A file with the master data for import should be uploaded to your Work Area. Click
![]() to select the file from the Work Area.
to select the file from the Work Area.
Select Delete the uploaded file, if you want the uploaded file to be deleted from the Work Area after the import.
You can download an EXCEL template with the data structure to be used for import.
The EXCEL file has the following tabs:
- Attribute Section: to list the attribute sections that are used within the imported classification groups
- Attribute: to list the details of attributes that are used within the imported classification groups
- Attribute Value Option: to list the attributes and their value options if used within the imported classification groups
- Classification: to define the classification to import
- Classification Group: to list the classification groups within the classification
- Classification Group to Attribute: to list the attribute assignments to the classification groups within the imported classification
Single Classification Excel Data Import operates as Excel Master Data Import but works with data listed in the imported file. It does not overwrite or delete any other data out of the scope of the Single Classification Excel Data file.
It is also possible to import multiple classifications data using this import.
Select the Update Type. The following types are available:
- insert: to add new data
- update: to update existing data
- insert-update: to add new data and update the existing.
The Job ID is pre-filled, but you can type any other unique Job ID.
Use a scheduler
![]() , to set the time for job execution, when applicable.
, to set the time for job execution, when applicable.
To receive an email notification on the job execution status, enter the email address into the Email field or click Use standard email address.
Click
to save the Job or
to execute it immediately.